
Log in
Similar topics
Latest topics
Saturday 7/7/18
2018-07-07, 21:07 by Gary M Jones
I was at the field today between 14:00 & 15:00 all on my own , good flying too. There is a dead sheep along the fence line towards the gate from the pits, I saw the farmer so reported this to her. I hope no one had plans for a BBQ  .
.
Farmer …
Farmer …
Comments: 1
Focke Wulf 190 F4C 1/4 Scale
+4
Rich
Brian Colclough
Zaidy
Mark Barnes
8 posters
Page 2 of 7
Page 2 of 7 •  1, 2, 3, 4, 5, 6, 7
 ![]()
Re: Focke Wulf 190 F4C 1/4 Scale
![]() by Guest 2009-08-20, 09:46
by Guest 2009-08-20, 09:46
Thanks John  At times, I think you were right the first time
Guest- Guest
Re: Focke Wulf 190 F4C 1/4 Scale
![]() by Guest 2009-08-20, 20:24
by Guest 2009-08-20, 20:24
Aileron horns on the FW190 were fitted at the root rib and the plans designer called for a single horn and a clevis. Now due to the root position it was considered that a Sullivan type clevis would not be strong, nor would it be scale. This photograph is from a FW190 under restoration I had the good fortune to examine in Florida last year.

The ply horn was replaced with two G10 material horns as shown in the aileron construction. This allowed a Rocket City 3mm ball link to be fitted between, indestructible one hopes and scale detail. It can be seen that the horn has a tapered fairing behind it and this was the next task.
A very simple method to make the fairing and for any type of scale bump, that needs to be stuck onto a models surface like air scoops, navi light holders, cannon fairing etc is to use “Plastic Padding” elastic car body repair filler. The main advantages of using this product over others is it is easy to shape during curing, when cured it is hard but flexible and easy to sand while some of its competitors become rock hard and brittle. You cannot use lightweight modelling filler, which is soft and dissolves easily if wetted.
To start the procedure off we place masking tape over the area where the part we want to make will sit. This is to protect the surface and also allows us to get the correct surface profile on the bottom of out part we want to make.

Next mix up the amount of filler and hardener necessary. If you want to avoid small air bubbles during curing make sure it is mixed thoroughly. Apply a generous dollop of the filler onto the tape making sure it is at least just bigger than the part you want to make and in the exact position. The larger the amount of filler used, the more gravity will want it to implode on itself and instead of a nice bump you’ll have something looking like a broken egg. If this is the case, a tip is to try and time it to apply this large dollop just before it starts to cure. It will be stiffer to stay up!
As you will see we don’t need a large amount of filler as the fairing isn’t that big. Now keep an eye the curing process. “Plastic Padding” starts to go like rubber before it finally cures hard and gives you a window of opportunity to roughly sculpture it with a scalpel. This helps greatly with sanding later, particularly if it is a detailed part your making. Now leave to fully cure.
Once cured, we peel the part off the tape and sand it to shape. The bottom surface will match exactly the profile of the model so take care with the next stage for small items.
CA tack glue small items onto the end of a stick. This will provide a very easy and secure way to hold it while you sand it from any direction necessary. It is important to tack glue or you will not get it off the stick without damaging the bottom profile.

Once sanded the part should be removed from the stick and dry fitted for a correct fit. Any final adjustments can be made and when you’re happy CA it into its final resting place. It’s now ready for painting.

The ply horn was replaced with two G10 material horns as shown in the aileron construction. This allowed a Rocket City 3mm ball link to be fitted between, indestructible one hopes and scale detail. It can be seen that the horn has a tapered fairing behind it and this was the next task.
A very simple method to make the fairing and for any type of scale bump, that needs to be stuck onto a models surface like air scoops, navi light holders, cannon fairing etc is to use “Plastic Padding” elastic car body repair filler. The main advantages of using this product over others is it is easy to shape during curing, when cured it is hard but flexible and easy to sand while some of its competitors become rock hard and brittle. You cannot use lightweight modelling filler, which is soft and dissolves easily if wetted.
To start the procedure off we place masking tape over the area where the part we want to make will sit. This is to protect the surface and also allows us to get the correct surface profile on the bottom of out part we want to make.
Next mix up the amount of filler and hardener necessary. If you want to avoid small air bubbles during curing make sure it is mixed thoroughly. Apply a generous dollop of the filler onto the tape making sure it is at least just bigger than the part you want to make and in the exact position. The larger the amount of filler used, the more gravity will want it to implode on itself and instead of a nice bump you’ll have something looking like a broken egg. If this is the case, a tip is to try and time it to apply this large dollop just before it starts to cure. It will be stiffer to stay up!
As you will see we don’t need a large amount of filler as the fairing isn’t that big. Now keep an eye the curing process. “Plastic Padding” starts to go like rubber before it finally cures hard and gives you a window of opportunity to roughly sculpture it with a scalpel. This helps greatly with sanding later, particularly if it is a detailed part your making. Now leave to fully cure.
Once cured, we peel the part off the tape and sand it to shape. The bottom surface will match exactly the profile of the model so take care with the next stage for small items.
CA tack glue small items onto the end of a stick. This will provide a very easy and secure way to hold it while you sand it from any direction necessary. It is important to tack glue or you will not get it off the stick without damaging the bottom profile.
Once sanded the part should be removed from the stick and dry fitted for a correct fit. Any final adjustments can be made and when you’re happy CA it into its final resting place. It’s now ready for painting.
Guest- Guest
Re: Focke Wulf 190 F4C 1/4 Scale
![]() by Guest 2009-09-10, 21:38
by Guest 2009-09-10, 21:38
Fibreglass cloth skinning was the next on the “to do list” and is probably the best covering for a sheeted surface on a model. Whilst the system is relatively simple, it is feared by some and conjures up scenes of one big sticky mess. Rather than post how here, I have made a step by step post on Handy Hints section “Covering with Fibreglass Cloth and Resin” which will help anyone wishing to use this method.
There are a number of products on the market and I use Pacer Z-Poxy Finishing Resin. It is very easy to mix, gives you a work time to cover large area’s before “going off”, it doesn’t run unless you really over do a flow coat and most of all it is easy to sand to get that final “babies bottom” smooth surface.

First Stage:
Surface should be smooth and dust free. The fibreglass cloth has an overlap of 3” to 4”. Using a 3” soft bristle brush I brush out the fibreglass cloth which becomes static and cloth clings to model surface.

Pacer Z-Poxy Finishing Resin and Hardener in a measuring cup and Methylated Spirit has been added in this photo. (I don’t mix in measuring cups). The Meth’s is used as a reducer.

The mixed viscosity is now like water and is intended. Starting in the centre of the cloth, I brush out in all directions the resin. Using care over large surfaces, not to drag the cloth when applying the resin or I would end up with an exposed surface area and no cloth when nearing the end of the job.
In this photo I have done one half of the underside of the wing and stopped just before the leading edge. I will later overlap it with the top surface covering.

Second Stage:
Using a scalpel I’ve trimmed the edge.

Now using a piece of 180 grit sand paper I rub the edges of the resin coated cloth and any excess untreated cloth comes away very easily. Continuing sanding gets a feathered edge. You get an invisible overlap seam.
Next will be to repeat Stage One all over again for the other half and top surfaces.
Third Stage:
I am now ready to give a final flow coat to the surface of 50:50 of Pacer Z-Poxy Finishing Resin and Hardener but this time I do not reduce it with Methylated Spirit. An even flow coat of the resin is applied over the fibreglass cloth to fill the weave of the cloth and once dried sanded down to that perfect “babies bottom” finish using 180 grit sand paper. The surface is then ready for it’s first coat of primer paint used as a guide to highlight any blemishes and uneven surface by sanding it all back off! Then a second final primer coat is applied with scale detail … another post for much later on, need to finish all the construction first.
There are a number of products on the market and I use Pacer Z-Poxy Finishing Resin. It is very easy to mix, gives you a work time to cover large area’s before “going off”, it doesn’t run unless you really over do a flow coat and most of all it is easy to sand to get that final “babies bottom” smooth surface.
First Stage:
Surface should be smooth and dust free. The fibreglass cloth has an overlap of 3” to 4”. Using a 3” soft bristle brush I brush out the fibreglass cloth which becomes static and cloth clings to model surface.
Pacer Z-Poxy Finishing Resin and Hardener in a measuring cup and Methylated Spirit has been added in this photo. (I don’t mix in measuring cups). The Meth’s is used as a reducer.
The mixed viscosity is now like water and is intended. Starting in the centre of the cloth, I brush out in all directions the resin. Using care over large surfaces, not to drag the cloth when applying the resin or I would end up with an exposed surface area and no cloth when nearing the end of the job.
In this photo I have done one half of the underside of the wing and stopped just before the leading edge. I will later overlap it with the top surface covering.
Second Stage:
Using a scalpel I’ve trimmed the edge.
Now using a piece of 180 grit sand paper I rub the edges of the resin coated cloth and any excess untreated cloth comes away very easily. Continuing sanding gets a feathered edge. You get an invisible overlap seam.
Next will be to repeat Stage One all over again for the other half and top surfaces.
Third Stage:
I am now ready to give a final flow coat to the surface of 50:50 of Pacer Z-Poxy Finishing Resin and Hardener but this time I do not reduce it with Methylated Spirit. An even flow coat of the resin is applied over the fibreglass cloth to fill the weave of the cloth and once dried sanded down to that perfect “babies bottom” finish using 180 grit sand paper. The surface is then ready for it’s first coat of primer paint used as a guide to highlight any blemishes and uneven surface by sanding it all back off! Then a second final primer coat is applied with scale detail … another post for much later on, need to finish all the construction first.
Guest- Guest
Re: Focke Wulf 190 F4C 1/4 Scale
![]() by Guest 2009-10-04, 23:03
by Guest 2009-10-04, 23:03
Progress has been slow as the competition season draws to a close and everyone is trying to get their events in before winter. I finished best scale at Pontefract, York’s a couple of weeks ago which pleased the wife as the trophy was a bottle of her favourite wine.
The stab was the next on the agenda and is made up of sheeted balsa covering balsa ribs.

The stab Trailing Edge requires a compound chamfer and the best way to be accurate is to mark and clamp a steel ruler to it. You then sand down to the straight edge for span wise and keep the sanding block in line with the airfoil shape in the other direction.

Half of the stab has been sheeted in this photo. Note the blocks for the pin hinges. These were omitted on the plans! So easy to forget about them when not drawn and you can’t retrofit them later.

The T.E. shroud to cover the leading edge of the elevators was made from Proskin and was a job to do around the stab tips. This scale detail was omitted from the plans!

Now for the elevators. We need the Leading Edge to mirror the chamfer on the stab TE. Also before cutting and sanding the Robart pin hinge positions are drilled. Easier now and more accurate than later on. Once the elevators have been constructed and aligned with the Stab, the hinge positions will be correspondingly marked on the Stab T.E.

The elevators are aircraft ply sheeting with scale cut outs covering balsa ribs. The blocks for Robart pin hinges are placed in the correct scale position (also omitted on the plans).

The top skin of aircraft ply is now glued and to achieve a perfect straight Trailing Edge it is clamped to the workbench while the glue dries. Once dry the Leading Edge is rounded so that it will snugly rotate inside the Stab T.E. shroud.

A deviation from the plans was to make a torsion bar connecting both Elevators together and silver soldering a horn in the centre. I did this with the Stuka and used a direct single servo link with a heavy duty carbon fibre push rod and HD Rocket City ball link. It works very well, is foolproof operation and best of all provides a “clean model” as it hides everything inside the fuselage with no push rods or horns sticking out anywhere. The plans called for two separate nyrods sticking out each side of the fuselage and servos that would need to be trimmed and identical speed rated or the model would twist out on a loop etc.

Once the fabricating had been completed, the elevators were covered with Solartex and simulated ribs stitching process as with the ailerons.


These two photographs show the original aircraft elevator trim tab/rib stitching and my attempt to replicate. You won’t see it once it’s in the air!


Now the Stab can be trimmed to fit the Elevators accurately and then glass clothed with the same procedure described for skinning the wings.

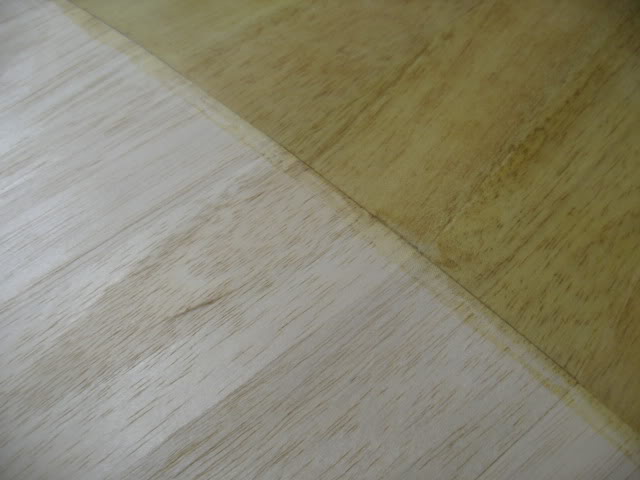
Can you see the join where half the Stab has been covered and the other half hasn’t at the Leading Edge?


The stab now requires fitting to the fuselage before sanding and painting.
My next planned task is to go back to the wings and fabricate the undercarriage doors……
The stab was the next on the agenda and is made up of sheeted balsa covering balsa ribs.
The stab Trailing Edge requires a compound chamfer and the best way to be accurate is to mark and clamp a steel ruler to it. You then sand down to the straight edge for span wise and keep the sanding block in line with the airfoil shape in the other direction.
Half of the stab has been sheeted in this photo. Note the blocks for the pin hinges. These were omitted on the plans! So easy to forget about them when not drawn and you can’t retrofit them later.
The T.E. shroud to cover the leading edge of the elevators was made from Proskin and was a job to do around the stab tips. This scale detail was omitted from the plans!
Now for the elevators. We need the Leading Edge to mirror the chamfer on the stab TE. Also before cutting and sanding the Robart pin hinge positions are drilled. Easier now and more accurate than later on. Once the elevators have been constructed and aligned with the Stab, the hinge positions will be correspondingly marked on the Stab T.E.
The elevators are aircraft ply sheeting with scale cut outs covering balsa ribs. The blocks for Robart pin hinges are placed in the correct scale position (also omitted on the plans).
The top skin of aircraft ply is now glued and to achieve a perfect straight Trailing Edge it is clamped to the workbench while the glue dries. Once dry the Leading Edge is rounded so that it will snugly rotate inside the Stab T.E. shroud.
A deviation from the plans was to make a torsion bar connecting both Elevators together and silver soldering a horn in the centre. I did this with the Stuka and used a direct single servo link with a heavy duty carbon fibre push rod and HD Rocket City ball link. It works very well, is foolproof operation and best of all provides a “clean model” as it hides everything inside the fuselage with no push rods or horns sticking out anywhere. The plans called for two separate nyrods sticking out each side of the fuselage and servos that would need to be trimmed and identical speed rated or the model would twist out on a loop etc.
Once the fabricating had been completed, the elevators were covered with Solartex and simulated ribs stitching process as with the ailerons.
These two photographs show the original aircraft elevator trim tab/rib stitching and my attempt to replicate. You won’t see it once it’s in the air!
Now the Stab can be trimmed to fit the Elevators accurately and then glass clothed with the same procedure described for skinning the wings.
Can you see the join where half the Stab has been covered and the other half hasn’t at the Leading Edge?
The stab now requires fitting to the fuselage before sanding and painting.
My next planned task is to go back to the wings and fabricate the undercarriage doors……
Guest- Guest
Re: Focke Wulf 190 F4C 1/4 Scale
![]() by Zaidy 2009-10-05, 06:45
by Zaidy 2009-10-05, 06:45
Richard T wrote:Progress has been slow as the competition season draws to a close and everyone is trying to get their events in before winter. I finished best scale at Pontefract, York’s a couple of weeks ago which pleased the wife as the trophy was a bottle of her favourite wine.
Well done Richard, excellent result. It would be really nice to see your scale model up in the air.
Zaidy- RDMFC Member
- Posts : 1434
RDMFC Bonus points : 1827
Join date : 2009-01-17
Location : Rhos on Sea -

Re: Focke Wulf 190 F4C 1/4 Scale
![]() by Guest 2009-10-05, 21:29
by Guest 2009-10-05, 21:29
This Sunday 11th October I'm competing at the Traplet Scale event at Deeside (makes a change from a few hundred mile drive, to have an event on the doorstep). On the coast road as you come out of Flint (speed camera after the town centre!!!) drive passed the power station, over the Queen Elizabeth bridge and next traffic island turn left through the gate. Normally public are not allowed but if you tell the guy on the gate your with me, he should let you in. I'll give him the nod if your about and not at 20,000 fathoms in some warm luxury holiday destintation .... it must be a hard life
Guest- Guest
Re: Focke Wulf 190 F4C 1/4 Scale
![]() by Guest 2009-10-06, 08:59
by Guest 2009-10-06, 08:59
hope all goes well this weekend at Deeside.Best of luck
Guest- Guest
Re: Focke Wulf 190 F4C 1/4 Scale
![]() by Guest 2009-10-06, 15:54
by Guest 2009-10-06, 15:54
Thank you. Glad it wasn't held today, where did that rain come from?
Hope to be able to post the retract doors soon. Half done
Hope to be able to post the retract doors soon. Half done
Guest- Guest
Re: Focke Wulf 190 F4C 1/4 Scale
![]() by Guest 2009-10-06, 22:39
by Guest 2009-10-06, 22:39
The gear doors was next on my “to do list” and need to be a perfect fit or judging marks will suffer. The airfoil section requires a curvature to the doors and to achieve this an effective construction method is to build the doors out of layers of glass cloth on top of the wheel well and retractable undercarriage leg areas directly onto the wing surface.
First a gear door template is made and then an outline is scribed with a pencil (there is a reason for recommending a pencil) on the wing surface in the correct position. Earlier planning for this stage ensured that reference marks were made to correctly align the gear door positions, as the wheel wells have been covered up. It is also important that the wing surface area has been sanded to it’s final finish ready for painting, to give a true contour.
To protect the wing surface, I used clear Monokote iron on covering which I have a supply of after winning a covering competition for the USA manufacturer several years ago. The covering is lightly “hot ironed” down flat with no air bubbles. Solar film and similar products of iron on covering are not suitable as once ironed down any attempt to remove them leaves the adhesive and parts of the covering or splinters the wing surface as it is removed. Monokote will not damage the surface and peels off like butter, leaving no adhesive or damage. It is done by applying gentle heat with an iron or hot air gun (I use the latter to remove). I could also use Profilm which is similar polyester product and available from good model shops, just stay away from Solar film for this procedure. The advantage of using “clear” covering material is that I need to be able to see the area I’m covering during the layering process and cutting out later.

The wing is masked off to protect from spillage. A first layer of 50g woven fibreglass cloth and undiluted epoxy finishing resin (as for the wing covering) is applied.

Followed by 2 layers of medium grade HD cloth (available from Halfords) followed by a final layer of 50g cloth. The HD cloth just saves time (otherwise I would have used 4 more layers of 50g cloth), but I do not use the coarse HD cloth common to car repairs and boat building. It is far too thick and coarse grain, you can’t get a smooth surface and will end up in all sort of trouble. The final layer of 50g cloth is necessary for a “final flow coat” of finishing resin to sand and achieve a perfect finished surface to paint. Hopefully you can see the grades of cloth and layers in this photo.

As each layer is applied it is allowed to “cure” before adding the next and with a light sanding to key the layers together. It isn’t necessary to wait over night before the next layer and each layer becomes transparent allowing the template outline to show through from the wing surface. If I apply the next layer before the curing process, the bottom layers will move and air bubbles form and I won’t be able to get the finished smooth surface I need. Once I have finished the layering, a final flow coat of resin is applied and left overnight ready for final sanding.
The next day I marked around the template, aligning with the outline seen through the layers. It was important to do this before I start to sand the resin down to a final smooth surface, as it becomes opaque and I will loose the reference points to cut the gear doors accurately and in the correct place. To make sure that I don’t loose this marked outline during sanding, only half the area is sanded. Then the outline is re-marked using the remaining visible outline as a guide. The other half is then sanded and the same procedure is followed (if you follow?).

I now have a sanded surface that is ready for paint (much later stage). The gear door layers are gently pulled off the Monokote and cut to shape. The inner surface is a perfect baby bottom smooth finish, that needs a light sand to help key the paint, when I get to that stage. Also the gear door inner frame still needs to be fabricated and glued to this surface. That is another task to follow and before I can do that, the gear door is placed back onto the wing, on top of the marked out area. This original outline may not be as accurate as the fabricated gear door and so the gear door is now used as a final template to outline the cut-out on the wing.

Now to take in a deep breath and cut the wheel wells or I should say; measure once, measure twice, measure thrice before cutting. We shall see when I make the next post if I got the alignment right as the wheel wells and undercarriage mounts are hidden from view. That’s all for now folks.
First a gear door template is made and then an outline is scribed with a pencil (there is a reason for recommending a pencil) on the wing surface in the correct position. Earlier planning for this stage ensured that reference marks were made to correctly align the gear door positions, as the wheel wells have been covered up. It is also important that the wing surface area has been sanded to it’s final finish ready for painting, to give a true contour.
To protect the wing surface, I used clear Monokote iron on covering which I have a supply of after winning a covering competition for the USA manufacturer several years ago. The covering is lightly “hot ironed” down flat with no air bubbles. Solar film and similar products of iron on covering are not suitable as once ironed down any attempt to remove them leaves the adhesive and parts of the covering or splinters the wing surface as it is removed. Monokote will not damage the surface and peels off like butter, leaving no adhesive or damage. It is done by applying gentle heat with an iron or hot air gun (I use the latter to remove). I could also use Profilm which is similar polyester product and available from good model shops, just stay away from Solar film for this procedure. The advantage of using “clear” covering material is that I need to be able to see the area I’m covering during the layering process and cutting out later.
The wing is masked off to protect from spillage. A first layer of 50g woven fibreglass cloth and undiluted epoxy finishing resin (as for the wing covering) is applied.
Followed by 2 layers of medium grade HD cloth (available from Halfords) followed by a final layer of 50g cloth. The HD cloth just saves time (otherwise I would have used 4 more layers of 50g cloth), but I do not use the coarse HD cloth common to car repairs and boat building. It is far too thick and coarse grain, you can’t get a smooth surface and will end up in all sort of trouble. The final layer of 50g cloth is necessary for a “final flow coat” of finishing resin to sand and achieve a perfect finished surface to paint. Hopefully you can see the grades of cloth and layers in this photo.
As each layer is applied it is allowed to “cure” before adding the next and with a light sanding to key the layers together. It isn’t necessary to wait over night before the next layer and each layer becomes transparent allowing the template outline to show through from the wing surface. If I apply the next layer before the curing process, the bottom layers will move and air bubbles form and I won’t be able to get the finished smooth surface I need. Once I have finished the layering, a final flow coat of resin is applied and left overnight ready for final sanding.
The next day I marked around the template, aligning with the outline seen through the layers. It was important to do this before I start to sand the resin down to a final smooth surface, as it becomes opaque and I will loose the reference points to cut the gear doors accurately and in the correct place. To make sure that I don’t loose this marked outline during sanding, only half the area is sanded. Then the outline is re-marked using the remaining visible outline as a guide. The other half is then sanded and the same procedure is followed (if you follow?).
I now have a sanded surface that is ready for paint (much later stage). The gear door layers are gently pulled off the Monokote and cut to shape. The inner surface is a perfect baby bottom smooth finish, that needs a light sand to help key the paint, when I get to that stage. Also the gear door inner frame still needs to be fabricated and glued to this surface. That is another task to follow and before I can do that, the gear door is placed back onto the wing, on top of the marked out area. This original outline may not be as accurate as the fabricated gear door and so the gear door is now used as a final template to outline the cut-out on the wing.
Now to take in a deep breath and cut the wheel wells or I should say; measure once, measure twice, measure thrice before cutting. We shall see when I make the next post if I got the alignment right as the wheel wells and undercarriage mounts are hidden from view. That’s all for now folks.
Guest- Guest
Re: Focke Wulf 190 F4C 1/4 Scale
![]() by Guest 2009-11-02, 22:09
by Guest 2009-11-02, 22:09
Having fabricated the undercarriage doors, the next job was to cut the wheel well’s and retract mounting position on the wing. Then the mountings were temporarily bolted down ready for fabricating the mounting system for the doors. There was no assistance offered on the plans for fabricating, mounting or scale detail for the gear doors, so after a bit of hedge scratching and rough drawings I came up with the following, which is near to scale in looks and operation

The top part of the gear door is fixed with fabricated brackets (from the USA) to the main leg. The bottom part of the door is separated just above the wheel and is attached to the bottom of the leg with another bracket at the axle point.

Sliding rails were fabricated out of K&S brass “U” strip to run along the length of the main leg and supported with lengths of hard wood which also helped with gluing. The “U” not only being functional is also a scale detail.

Short lengths of K&S brass “L” strip were attached to the wheel doors and fitted with two 2mm stainless steel cap head bolts on each side, which fit into the “U” channels.

While taxing or landings the “scissors” move on compression and the wheel door can slide up and down with the wheel and prevent them from being damaged on uneven taxiways. Using fibreglass for the doors also had the benefit of them being flexible, while if fabricated from metal and became damaged they wouldn’t return to their original shape and more likely to cause the gear to get “hung up” just when you don’t want it to, like when landing
If you look carefully in this photo you can see how well the fibreglass has locked in the shape of the airfoil around the wheel. Fibreglass if knocked will return to it’s original fabricated shaped, while metal won’t.


The only job left to do now will be to add additional scale detail, like pneumatic lines, wheel well components and inner door liners before painting. I shan’t get round to doing this until I have finished constructing the whole of the model. The finer points of scale detail are very time consuming and can take just as long if not longer to do than building the model, so I prefer to leave it for another day or year. I also have to work out how I’m going to fabricate the gear down indicators, that is a “pin” that pops up out of the top surface of the wing directly above the pivot point of the main legs, which have taken nearly all the room up in my wing. When the undercarriage is retracted, the pin retracts to inside the wing. I may consider using micro servo’s with radio mix on the gear switch.
The top part of the gear door is fixed with fabricated brackets (from the USA) to the main leg. The bottom part of the door is separated just above the wheel and is attached to the bottom of the leg with another bracket at the axle point.
Sliding rails were fabricated out of K&S brass “U” strip to run along the length of the main leg and supported with lengths of hard wood which also helped with gluing. The “U” not only being functional is also a scale detail.
Short lengths of K&S brass “L” strip were attached to the wheel doors and fitted with two 2mm stainless steel cap head bolts on each side, which fit into the “U” channels.
While taxing or landings the “scissors” move on compression and the wheel door can slide up and down with the wheel and prevent them from being damaged on uneven taxiways. Using fibreglass for the doors also had the benefit of them being flexible, while if fabricated from metal and became damaged they wouldn’t return to their original shape and more likely to cause the gear to get “hung up” just when you don’t want it to, like when landing
If you look carefully in this photo you can see how well the fibreglass has locked in the shape of the airfoil around the wheel. Fibreglass if knocked will return to it’s original fabricated shaped, while metal won’t.
The only job left to do now will be to add additional scale detail, like pneumatic lines, wheel well components and inner door liners before painting. I shan’t get round to doing this until I have finished constructing the whole of the model. The finer points of scale detail are very time consuming and can take just as long if not longer to do than building the model, so I prefer to leave it for another day or year. I also have to work out how I’m going to fabricate the gear down indicators, that is a “pin” that pops up out of the top surface of the wing directly above the pivot point of the main legs, which have taken nearly all the room up in my wing.
Guest- Guest
Re: Focke Wulf 190 F4C 1/4 Scale
![]() by Guest 2009-11-03, 08:51
by Guest 2009-11-03, 08:51
It looks fantastic,your doing an excellent job.
Guest- Guest
Re: Focke Wulf 190 F4C 1/4 Scale
![]() by Guest 2009-11-14, 23:28
by Guest 2009-11-14, 23:28
Any news on the build so far?
Cant wait to see the finished product!
Cant wait to see the finished product!
Guest- Guest
Re: Focke Wulf 190 F4C 1/4 Scale
![]() by Guest 2009-11-27, 23:36
by Guest 2009-11-27, 23:36
Sam been very busey at work but here is where I'm upto with the fuselage.


The cylinder is the air tank for the sliding cockpit canopy and retracting tail wheel. A separate air cylinder for the main undercarriage will be installed inside the wing.

Hope to have some more photo's and description soon.
The cylinder is the air tank for the sliding cockpit canopy and retracting tail wheel. A separate air cylinder for the main undercarriage will be installed inside the wing.
Hope to have some more photo's and description soon.
Guest- Guest


Mark Barnes- Club Secretary
- Posts : 6607
RDMFC Bonus points : 8240
Join date : 2008-11-16
Location : Rhyl North Wales
Re: Focke Wulf 190 F4C 1/4 Scale
![]() by Guest 2009-12-07, 21:22
by Guest 2009-12-07, 21:22
HOLY C**P!!!!!!
WOWOWOWOWOWOWOWOW
That looks like one HELL of a engine!!!
Lets hope the performance is as good as it looks!!
WOWOWOWOWOWOWOWOW
That looks like one HELL of a engine!!!
Lets hope the performance is as good as it looks!!
Guest- Guest
Re: Focke Wulf 190 F4C 1/4 Scale
![]() by Guest 2009-12-08, 23:30
by Guest 2009-12-08, 23:30
The Moki 150cc Radial purs at 1/4 throttle and is just awsome if anyone has seen Ali flying his FW190-A8 with one at the shows last year.
One of those jobs that require measuring once, twice and thrice from all directions is setting the wing and incidence. On the FW190 main wing 2.5 degrees positive and accuracy will result in very good flight handling, which is a must for a warbird, which can adopt the bad habits of the full size prototype.

The fuselage datum is set to zero and then with the help of my Robart incidence meter, the wing saddle is gently shaved until the required incidence is achieved. At the same time we need to keep the wings square.


A tape measure is centrally anchored at a suitable distance towards the tail and each wing tip is measured and adjusted so that the readings are the same. We also need the wings to be level, so the wing tip height is also measured from the table. By the time it was correct I had been shaving the wing saddle and measuring once, twice, thrice all evening.
A fault by the designer on the plans is that he has drawn the belly of the fuselage too deep and the size of the formers just behind the wing back to the tail. The error if not corrected also requires a fairing to be fitted running along the belly of the wing, which is total wrong. This is an issue with the correct 3-view outline and scale judges would deduct marks from the static score. I was aware of this issue and a friend of my in the USA sent me an overlay of the correct outline (in red) over the plans. I have highlighted the area with blue arrows.

As you can see from the photo of my model it translates into a big error.

This photo of the full size prototype shows how stream lined it should be.

Now that I have set the incidence, I can mark the former at the TE and cut it to the required shape and depth. I will then be able to cut and realign each former back to the tail. My next task is likely to be setting the tailplane incidence, which is the same procedure as for the wing.
One of those jobs that require measuring once, twice and thrice from all directions is setting the wing and incidence. On the FW190 main wing 2.5 degrees positive and accuracy will result in very good flight handling, which is a must for a warbird, which can adopt the bad habits of the full size prototype.
The fuselage datum is set to zero and then with the help of my Robart incidence meter, the wing saddle is gently shaved until the required incidence is achieved. At the same time we need to keep the wings square.
A tape measure is centrally anchored at a suitable distance towards the tail and each wing tip is measured and adjusted so that the readings are the same. We also need the wings to be level, so the wing tip height is also measured from the table. By the time it was correct I had been shaving the wing saddle and measuring once, twice, thrice all evening.
A fault by the designer on the plans is that he has drawn the belly of the fuselage too deep and the size of the formers just behind the wing back to the tail. The error if not corrected also requires a fairing to be fitted running along the belly of the wing, which is total wrong. This is an issue with the correct 3-view outline and scale judges would deduct marks from the static score. I was aware of this issue and a friend of my in the USA sent me an overlay of the correct outline (in red) over the plans. I have highlighted the area with blue arrows.
As you can see from the photo of my model it translates into a big error.
This photo of the full size prototype shows how stream lined it should be.
Now that I have set the incidence, I can mark the former at the TE and cut it to the required shape and depth. I will then be able to cut and realign each former back to the tail. My next task is likely to be setting the tailplane incidence, which is the same procedure as for the wing.
Guest- Guest
Re: Focke Wulf 190 F4C 1/4 Scale
![]() by Guest 2009-12-09, 08:14
by Guest 2009-12-09, 08:14
Looking smart!
Now chuck the vapour electronics on it and lets go to lysfaen!!!
Now chuck the vapour electronics on it and lets go to lysfaen!!!
Guest- Guest
Re: Focke Wulf 190 F4C 1/4 Scale
![]() by Brian Colclough 2009-12-09, 11:35
by Brian Colclough 2009-12-09, 11:35
I don't think it's an error on behalf of Nick Ziroli, I can't remember the exact wording on their website and I can't be bothered copying and pasting it verbatum but I think the gist of it is that his plans produce a near scale model that is at home on the club field that with a little effort and modification can be brought up to scale competition standard which is obviously what you Richard are doing to your usual high standard 
Brian Colclough- Posts : 3238
RDMFC Bonus points : 4736
Join date : 2008-11-17
Location : Rhuddlan -
Re: Focke Wulf 190 F4C 1/4 Scale
![]() by Guest 2009-12-11, 19:52
by Guest 2009-12-11, 19:52
Aye, but this plan is from the Vailly stable and won top gun some years ago. Any kit or plans normally have some designer flaws, often intentionaly and for this reason it is always wise do plenty of research before cutting the wood. Judges are only interested in a scale reproduction. The belly flaw is an easy fix if noticed before it's too late.
The line shows the true outline to be cut, now that the wing has been removed and one can see how much the plans are out by.

Deep breath and the bottom is cut off and reset. Job done.


The line shows the true outline to be cut, now that the wing has been removed and one can see how much the plans are out by.
Deep breath and the bottom is cut off and reset. Job done.
Guest- Guest
Re: Focke Wulf 190 F4C 1/4 Scale
![]() by Guest 2009-12-11, 20:00
by Guest 2009-12-11, 20:00
Ah haaaa!!!
I see I see
Why dint they fix it on the plan?
I mean its not like it is that hard to do a slight fix is it?
I see I see
Why dint they fix it on the plan?
I mean its not like it is that hard to do a slight fix is it?
Guest- Guest
Re: Focke Wulf 190 F4C 1/4 Scale
![]() by Brian Colclough 2009-12-11, 20:47
by Brian Colclough 2009-12-11, 20:47
Sorry my "bad" thought it was a Ziroli plan
Brian Colclough- Posts : 3238
RDMFC Bonus points : 4736
Join date : 2008-11-17
Location : Rhuddlan -
Page 2 of 7 • 1, 2, 3, 4, 5, 6, 7 ![]()
Page 2 of 7
Permissions in this forum:
You cannot reply to topics in this forum|
|
|
» Need help on how to just directly power my Detrum RXC6 6CH 2.4Ghz Receiver?
» 2019 Llanfair TH Village Fete
» Police crash
» Bit of indoors