
Log in
Similar topics
Latest topics
Saturday 7/7/18
2018-07-07, 21:07 by Gary M Jones
I was at the field today between 14:00 & 15:00 all on my own , good flying too. There is a dead sheep along the fence line towards the gate from the pits, I saw the farmer so reported this to her. I hope no one had plans for a BBQ  .
.
Farmer …
Farmer …
Comments: 1
Focke Wulf 190 F4C 1/4 Scale
+4
Rich
Brian Colclough
Zaidy
Mark Barnes
8 posters
Page 5 of 7
Page 5 of 7 •  1, 2, 3, 4, 5, 6, 7
 ![]()
Re: Focke Wulf 190 F4C 1/4 Scale
![]() by Guest 2010-07-01, 20:52
by Guest 2010-07-01, 20:52
With the competition season hindering my building I’m pleased to announce that the first coat of paint has gone on  . I enjoy paint spraying but do not savour the job of sanding beforehand, which is where it all makes the difference to the final finish. The dust gets everywhere, so outside with a face mask is ideal but it’s been a bit hot making the job uncomfortable
  . While I was at Weston Park there was some talk about my “Stuka” being a fibreglass mould, which it is not and those in the know put many right for me


I’m hoping for the same finish on the “Butcher Bird” and using the same 2K primer paint from U-Poxy. It has a good flow rate and sands beautifully
Just before the first coat of primer went on some scale detail was still needed.
The underside of the wings required the outer cannon covers/fairing.
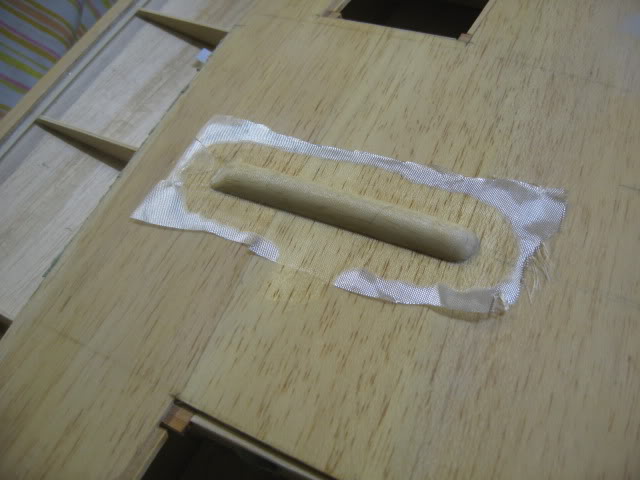
And the retracts required the hatch panels surrounding the mounts, which I made from “Proskin”. You can also see in this photo that I’ve made the fairing for the outer wing cannon (auto repair filler).

Here the model has had three primer coats sanded down to reveal any blemishes


Also required prior to painting were the inner and outer cannon fairing’s on the top of the wing. You can just make them out (sun was a bit too bright and after the paint had gone on).

Once any imperfections have been sorted, the odd pin hole in the glass cloth etc, a final primer flow coat will be sprayed and then a light sand, finished off with a scotch pad to give an ultra smooth finish (just as if it’s come out of a mould ). Then I can start on one of the procedures I really enjoy …. applying panel lines and rivets etc …. I should be able to get a final “skin” coat before the weather turns cold
I hope to post some more detail over the summer
I’m hoping for the same finish on the “Butcher Bird” and using the same 2K primer paint from U-Poxy. It has a good flow rate and sands beautifully
Just before the first coat of primer went on some scale detail was still needed.
The underside of the wings required the outer cannon covers/fairing.
And the retracts required the hatch panels surrounding the mounts, which I made from “Proskin”. You can also see in this photo that I’ve made the fairing for the outer wing cannon (auto repair filler).
Here the model has had three primer coats sanded down to reveal any blemishes
Also required prior to painting were the inner and outer cannon fairing’s on the top of the wing. You can just make them out (sun was a bit too bright and after the paint had gone on).
Once any imperfections have been sorted, the odd pin hole in the glass cloth etc, a final primer flow coat will be sprayed and then a light sand, finished off with a scotch pad to give an ultra smooth finish (just as if it’s come out of a mould
I hope to post some more detail over the summer
Guest- Guest
Re: Focke Wulf 190 F4C 1/4 Scale
![]() by Guest 2010-07-26, 23:26
by Guest 2010-07-26, 23:26
The base coat for the final skin has now been sprayed, (I have decided on a new colour scheme which I will leave till the end) and I have started on the panel lines. Applying graphic art tape and then over spraying makes them a perfect butt joint when the tape is removed. In the first photo you get a better look at the cannon covers that were not so clear on a previous post. The black lines are the applied tape before paint is sprayed.


What you get before the tape is removed…

What you get before the tape is removed…
Guest- Guest
Re: Focke Wulf 190 F4C 1/4 Scale
![]() by Guest 2010-07-26, 23:27
by Guest 2010-07-26, 23:27
Very nice!!!
It has been a while since the last update, have you been busy?
It has been a while since the last update, have you been busy?
Guest- Guest
Re: Focke Wulf 190 F4C 1/4 Scale
![]() by Guest 2010-07-26, 23:31
by Guest 2010-07-26, 23:31
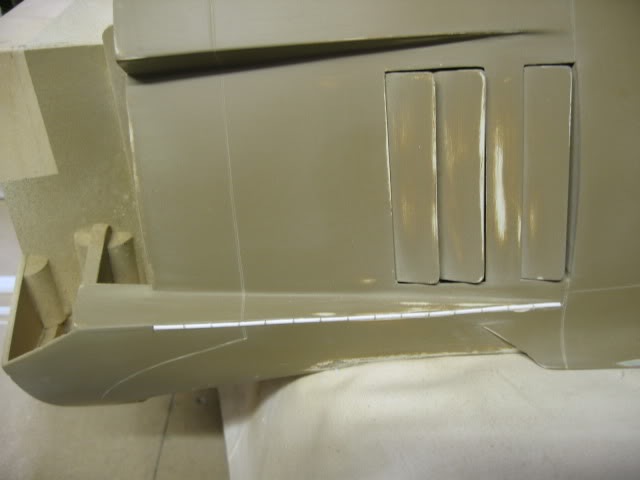
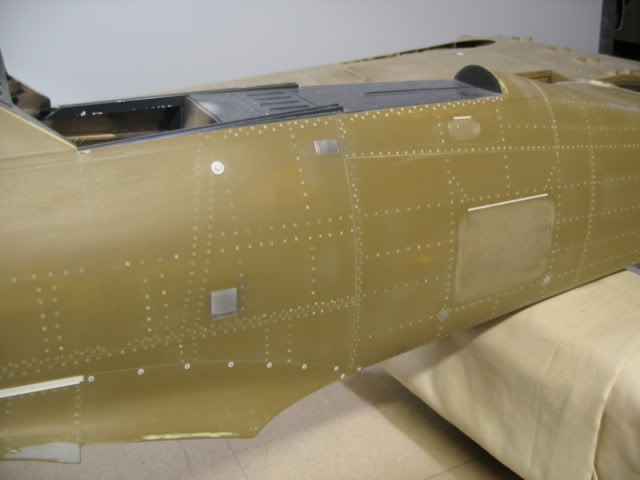
On the wing underside I needed to make some “raised panels” for the cannon inspection hatches. These are made by taping off the area where you do not want any pant to fall on the model and then spraying in the uncovered area. The leading edge also has a raised panel formed around from above to below surfaces and can also be seen taped off ready for paint.

This photo is of an FW190 which has the outer cannon removed. The inspection cover and fairing can be seen just to the right of the undercarriage leg and how the skin panel is wrapped around the leading edge.


This photo is of an FW190 which has the outer cannon removed. The inspection cover and fairing can be seen just to the right of the undercarriage leg and how the skin panel is wrapped around the leading edge.
Guest- Guest
Re: Focke Wulf 190 F4C 1/4 Scale
![]() by Guest 2010-07-26, 23:36
by Guest 2010-07-26, 23:36
Yes Sam I’ve been competing around the country with my Stuka and a couple of weeks ago won the Traplet Unlimited Scale event at SCRC. Masking and painting takes time also. The saying is once you have finished constructing your not even half way!
Guest- Guest
Re: Focke Wulf 190 F4C 1/4 Scale
![]() by Guest 2010-07-26, 23:37
by Guest 2010-07-26, 23:37
The tail area also has a raised panel on top of a raised panel around the root of the tailplane as part of the adjustable incidence for the stabiliser. While masking for this job I also did the leading edge of the fin which is a raised panel with a butt joint panel line between the two areas and below. And a raised panel leading edge on the tailplane. Headache . This is what I ended up doing….

This was the result …..

This is what I hope I have duplicated ..…

More to follow.
This was the result …..
This is what I hope I have duplicated ..…
More to follow.
Guest- Guest
Re: Focke Wulf 190 F4C 1/4 Scale
![]() by Guest 2010-07-26, 23:42
by Guest 2010-07-26, 23:42
Very nice, The pannel lines really do match up to the real thing!!!
Guest- Guest

Rich- Treasurer/Membership Secretary
- Posts : 4742
RDMFC Bonus points : 5694
Join date : 2008-11-18
Location : 53.3200°N, 3.4726°W -

Re: Focke Wulf 190 F4C 1/4 Scale
![]() by Guest 2010-07-30, 21:52
by Guest 2010-07-30, 21:52
Thanks guy's
A few short hinge jobs done ….
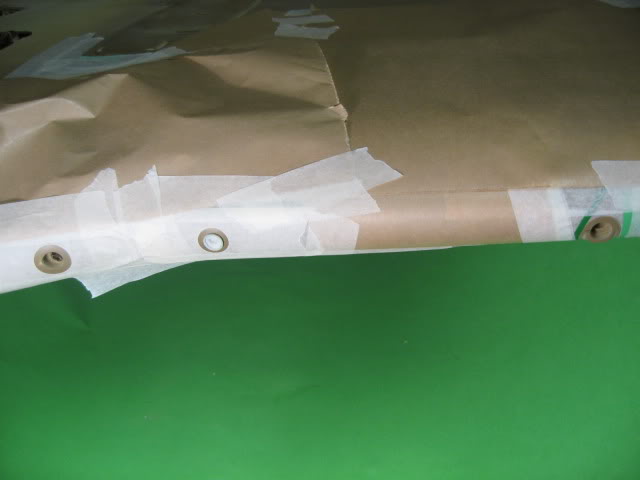
The hinge for the front exhaust panel was made by using plastic tube and a wire centre and then CA into place. Not functional. I even counted the number of hinge units and positions in relation to referance points i.e. panel line. This is where the hair splitting judge trys to mark you down

And the tailwheel retract maintenance access door and hinge

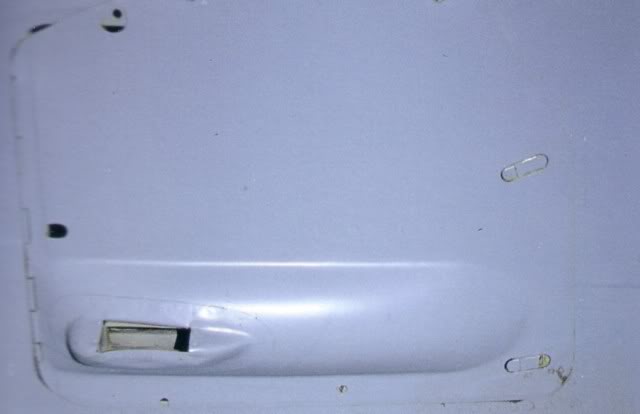
and the real thing …. the inside has not be made to scale, have to draw a line

A few short hinge jobs done ….
The hinge for the front exhaust panel was made by using plastic tube and a wire centre and then CA into place. Not functional. I even counted the number of hinge units and positions in relation to referance points i.e. panel line. This is where the hair splitting judge trys to mark you down
And the tailwheel retract maintenance access door and hinge
and the real thing …. the inside has not be made to scale, have to draw a line
Guest- Guest
Re: Focke Wulf 190 F4C 1/4 Scale
![]() by Guest 2010-09-02, 22:47
by Guest 2010-09-02, 22:47
What a busy summer it has been trying to get on with the build between work, rest and play but I’m slowly catching up. It’s surprising how much time it takes up to do the editorial and to photograph for a post on the forum. Sometimes twice as long as the subject.
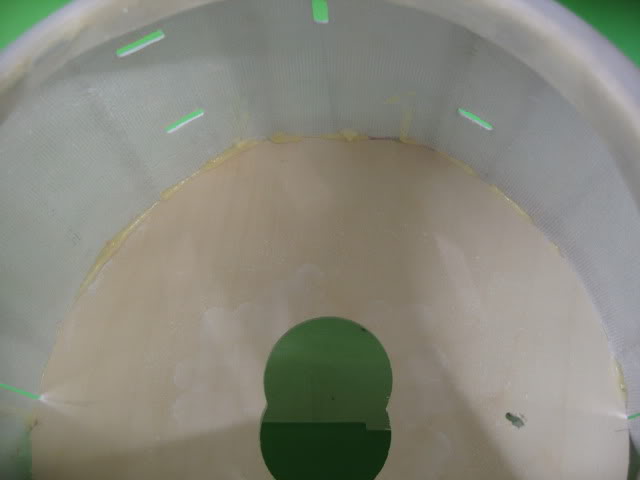
The cowl was a job that required the engine configuration, to mount it correctly. A jig was made which centred everything and using a ply template of the scale engine cooling fan diameter it was screwed to the end of the centred dowel, allowing correct alignment of the cowl. I couldn’t use the engine itself as I need to get inside for the mounting plate and the engine fills the cowl.


Next was to set the aircraft ply-mounting ring inside to mate up against the mounting points on the firewall. 4 bolts within the cowl will secure the cowl in place. First a cardboard template was made before making a ¼” aircraft ply version. The plate hasn’t been cut down in size in the photograph but will eventually only be ¾” wide around the cowl.


The best glue for this job is polyurethane, which foams to make a neat fillet and gets into any crevices.
In this photo the glue fillet was actually applied on the other side and you can see how effect it is as seeping though. The other advantage of using poly glue is it sticks to just about everything and wood to fibreglass can be notorious for not being a good bond when vibration is likely to an issue.
The cowl was a job that required the engine configuration, to mount it correctly. A jig was made which centred everything and using a ply template of the scale engine cooling fan diameter it was screwed to the end of the centred dowel, allowing correct alignment of the cowl. I couldn’t use the engine itself as I need to get inside for the mounting plate and the engine fills the cowl.
Next was to set the aircraft ply-mounting ring inside to mate up against the mounting points on the firewall. 4 bolts within the cowl will secure the cowl in place. First a cardboard template was made before making a ¼” aircraft ply version. The plate hasn’t been cut down in size in the photograph but will eventually only be ¾” wide around the cowl.
The best glue for this job is polyurethane, which foams to make a neat fillet and gets into any crevices.
In this photo the glue fillet was actually applied on the other side and you can see how effect it is as seeping though. The other advantage of using poly glue is it sticks to just about everything and wood to fibreglass can be notorious for not being a good bond when vibration is likely to an issue.
Guest- Guest
Re: Focke Wulf 190 F4C 1/4 Scale
![]() by Guest 2010-09-02, 22:48
by Guest 2010-09-02, 22:48
Next task was to cut out the hinge and catches positions. This was made relative easily with a PermaGrit bit in a Dremel drill.


I’m in the process of adding further scale detail and panel lines, which I will post sometime soon.

I’m in the process of adding further scale detail and panel lines, which I will post sometime soon.
Guest- Guest
Re: Focke Wulf 190 F4C 1/4 Scale
![]() by Guest 2010-09-02, 22:49
by Guest 2010-09-02, 22:49
I’ve also made the wing cannon ejection ports on the underside of the wing. There are 3 different types of ejector ports, the two inner cannons are basically chutes of the same design as seen here …… (The blue photo is the full size aircraft for comparison).


The two outer cannons ejector ports are different and took some time to do. You won’t see them in the air or on the ground unless you lie on your back.


I’ve also fitted the latches to the inner cannon access covers.

The two outer cannons ejector ports are different and took some time to do. You won’t see them in the air or on the ground unless you lie on your back.
I’ve also fitted the latches to the inner cannon access covers.
Guest- Guest
Re: Focke Wulf 190 F4C 1/4 Scale
![]() by Guest 2010-09-03, 12:34
by Guest 2010-09-03, 12:34
if you hadn't had to drink the Quality Wine so to use the cardboard it would have been a quicker build 
superb build Should win everything
superb build Should win everything
Guest- Guest
Re: Focke Wulf 190 F4C 1/4 Scale
![]() by Guest 2010-09-03, 23:36
by Guest 2010-09-03, 23:36
Hick ...  It was a memorable moment, John
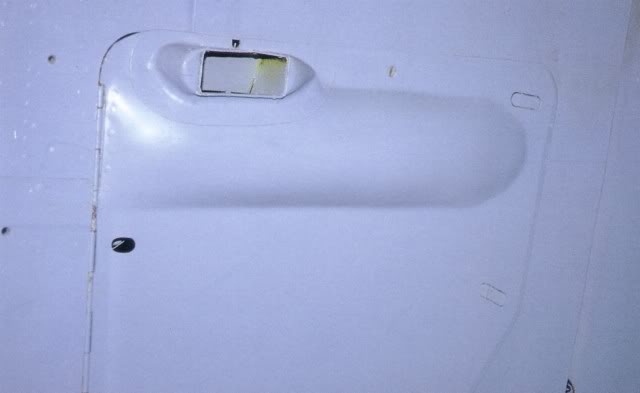
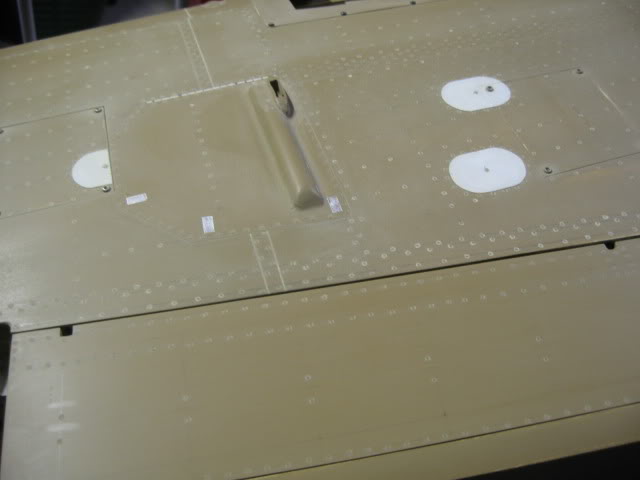
Another task was the leading edge camera port. This was made using a generous dollop of car body filler on top of some masking tape. Once cured it was removed and sanded to shape then using CA was glued back into final position. The lens will be fitted after final painting.


This then brought me onto building up a scale surround for the camera port and cannon positions. As before the shape was taped around and then several coats of primer paint used to build up the panel effect.

The end result.

It was a memorable moment, John Another task was the leading edge camera port. This was made using a generous dollop of car body filler on top of some masking tape. Once cured it was removed and sanded to shape then using CA was glued back into final position. The lens will be fitted after final painting.
This then brought me onto building up a scale surround for the camera port and cannon positions. As before the shape was taped around and then several coats of primer paint used to build up the panel effect.
The end result.
Guest- Guest
Re: Focke Wulf 190 F4C 1/4 Scale
![]() by Guest 2010-09-03, 23:52
by Guest 2010-09-03, 23:52
Now for one of the moments I find fun........ Rivets 
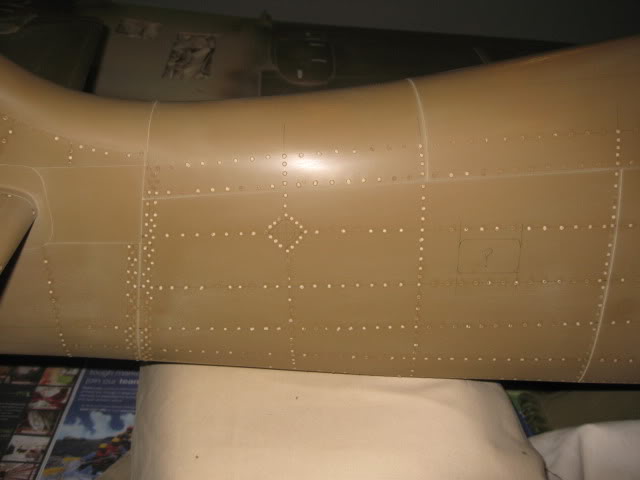
I’m halfway through marking out the positions for rivet detail on the fuselage, here you can see the tail area. The actual rivets are applied by eye, it would take forever to mark the position of every individual rivet.


Then I will start to burn the rivets into the paint using a soldering iron which I fitted with a small brass tube.

Unlike using PVA glue for raised rivets which can be wiped off if a mistake is made, flush rivets are a one shot, do it right first time and there are a thousand or so to do. My Stuka took just over a fortnight every evening to finish. Here is the upper tail area nearly finished, (awaiting a rub down with a scotch pad to get rid of the rough edges). I expect to finish the fuselage sometime next week before starting on the wings.

I hope to post more updates soon, now where did I put that last bottle of wine .
I’m halfway through marking out the positions for rivet detail on the fuselage, here you can see the tail area. The actual rivets are applied by eye, it would take forever to mark the position of every individual rivet.
Then I will start to burn the rivets into the paint using a soldering iron which I fitted with a small brass tube.
Unlike using PVA glue for raised rivets which can be wiped off if a mistake is made, flush rivets are a one shot, do it right first time
I hope to post more updates soon, now where did I put that last bottle of wine
.
Guest- Guest

Mark Barnes- Club Secretary
- Posts : 6607
RDMFC Bonus points : 8240
Join date : 2008-11-16
Location : Rhyl North Wales
Re: Focke Wulf 190 F4C 1/4 Scale
![]() by Guest 2010-09-20, 20:55
by Guest 2010-09-20, 20:55
Rivetitous is setting in ……. here are some updates:
I’ve done varied access panels, some hinges and the fuel filler port …

I managed to find some 00 and 000 screws (cor blimey they are small) for some of the scale detail …

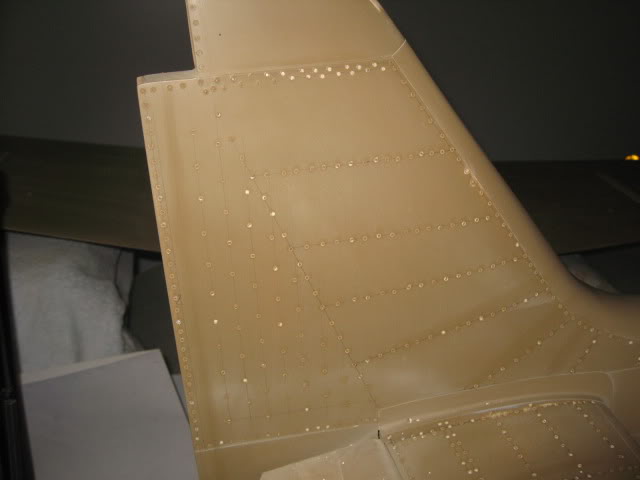
Wing was marked out ready for riveting …..

the result …..

Still need to finish the underside of the wing and go over it with a scotch pad.
I’ve done varied access panels, some hinges and the fuel filler port …
I managed to find some 00 and 000 screws (cor blimey they are small) for some of the scale detail …
Wing was marked out ready for riveting …..
the result …..
Still need to finish the underside of the wing and go over it with a scotch pad.
Guest- Guest
Re: Focke Wulf 190 F4C 1/4 Scale
![]() by Guest 2010-10-26, 20:15
by Guest 2010-10-26, 20:15
A few updates
Rivets!!!!! …. (thousands of the little blighters)


More detail on rivets to follow.
Rivets!!!!! …. (thousands of the little blighters)
More detail on rivets to follow.
Guest- Guest
Re: Focke Wulf 190 F4C 1/4 Scale
![]() by Guest 2010-10-26, 20:18
by Guest 2010-10-26, 20:18
The front part of the canopy has been done using a stock canopy from Vailly Aviation. On close examination of the glass area it looked OK until one put it next to some crystal clear Perspex that I have from Mick Reeves. Like chalk and cheese, so I cut out the window areas and replaced with the Mick Reeves material. I also had to make the scale indents in the “A” pillars (3 each side). It was then given a final coat of RLM66 paint on the inside, as it would be near impossible to get at once glued in place.

Micks stuff is on the left, but is much clearer on the finished article


I later added the windscreen washer plumbing ……..

Micks stuff is on the left, but is much clearer on the finished article
I later added the windscreen washer plumbing ……..
Guest- Guest
Re: Focke Wulf 190 F4C 1/4 Scale
![]() by Guest 2010-10-26, 20:23
by Guest 2010-10-26, 20:23
The Engine Cowl and Gun Hood were next on the to do list, which never seems to get shorter, if anything it continues to grow as more scale detail is applied.
They were offered up to the fuselage to check for position of latches, hinges and rivet detail (those little chaps never seem to have an end in sight).

Positions were marked and off we go ……..

Latches fitted.

Side hinges (5 in total)

Bingo ….. were getting there!

Back soon.
They were offered up to the fuselage to check for position of latches, hinges and rivet detail (those little chaps never seem to have an end in sight).
Positions were marked and off we go ……..
Latches fitted.
Side hinges (5 in total)
Bingo ….. were getting there!
Back soon.
Guest- Guest
Rich- Treasurer/Membership Secretary
- Posts : 4742
RDMFC Bonus points : 5694
Join date : 2008-11-18
Location : 53.3200°N, 3.4726°W -
Marty- Posts : 984
RDMFC Bonus points : 1196
Join date : 2010-02-22
Location : Holyhead -
Re: Focke Wulf 190 F4C 1/4 Scale
![]() by Guest 2010-10-28, 18:33
by Guest 2010-10-28, 18:33
Thank you chaps
I finally managed to finish off the under wing cannon access/ejector covers (another job finally ticked off the list, at last it’s getting shorter).

I finally managed to finish off the under wing cannon access/ejector covers (another job finally ticked off the list, at last it’s getting shorter).
Guest- Guest
Re: Focke Wulf 190 F4C 1/4 Scale
![]() by Guest 2010-10-28, 18:36
by Guest 2010-10-28, 18:36
The flaps are finished awaiting final top coat. They have been dry fitted for accuracy and operation but will be painted separately so that I can get paint into the areas inside the wing and the flap leading edge areas. Very difficult to do once they are permanently installed , which will be done at final assembly with the radio gear.

Another job was to finish off the extension detail on the main wheel covers (only fitted to the A8 mark) which I nearly missed and add more detail (including rivets). They are to scale operation, the bottom cover can slide up with the oleo gear on landing compression.

Another job was to finish off the extension detail on the main wheel covers (only fitted to the A8 mark) which I nearly missed and add more detail (including rivets). They are to scale operation, the bottom cover can slide up with the oleo gear on landing compression.
Guest- Guest
Page 5 of 7 • 1, 2, 3, 4, 5, 6, 7 ![]()
Page 5 of 7
Permissions in this forum:
You cannot reply to topics in this forum|
|
|
» Police crash
» Bit of indoors
» For Sale
» selling up finaly!