
Log in
Similar topics
Latest topics
Saturday 7/7/18
2018-07-07, 21:07 by Gary M Jones
I was at the field today between 14:00 & 15:00 all on my own , good flying too. There is a dead sheep along the fence line towards the gate from the pits, I saw the farmer so reported this to her. I hope no one had plans for a BBQ  .
.
Farmer …
Farmer …
Comments: 1
Covering with Fibreglass Cloth & Resin
RDMFC :: Handy Hints
Page 1 of 1

Covering with Fibreglass Cloth & Resin
![]() by Guest 2009-09-10, 20:53
by Guest 2009-09-10, 20:53
Fibreglass cloth skinning is probably the best covering for a sheeted surface on a model. Whilst the system is relatively simple, it is feared by some and conjures up scenes of one big sticky mess and the resin hardening before your finished resulting in a look like an “artexed ceiling”. There are a few grounds rules, which if followed will result in a perfect finish and with ease.
There are a number of products on the market and probably the three most popular are; Ripmax SP Resin System, Poly C and Pacer Z-Poxy Finishing Resin. I’ve tried them over the years and the later is my preferred choice for a number of reasons. It is very easy to mix, gives you a work time to cover large area’s before “going off”, it doesn’t run unless you really over do a flow coat and most of all it is easy to sand to get that final “babies bottom” smooth surface.
Resin products are two part systems with a resin and hardener needing to be mixed together. Some products require a 2:1 ratio or ten drops of hardener to resin. Pacer Finishing Resin is a straight forward 50:50 mix and supplied in two squeeze bottles with colour coded tops so that you don’t forget which cap fits which bottle!

Finishing resin is the 2nd box from the right? Don’t use 5 min or 30 min epoxy resin glues for fibreglass cloth skinning. They are not manufactured or recommended for this use, so make sure you don’t mix the bottles up.
There are a number of ways to apply resin systems and this is normally when fear strikes. All work and have their merits. Some systems can be applied as a full strength mixture by dribbling it all over the glass cloth and spread it with a credit card until all the surface is saturated. This is without doubt a quick way to get the surface covered and I will use it for small areas to be covered. However I find on large areas requiring covering (wings and fuselage), if one is not careful the glass cloth stretches and can be difficult to cover compound curves (where the Fin and Stab join for example). Also being full strength one has to be careful with resin running particularly over lap areas when doing one piece of cloth at a time. Who wants ridges where the cloth pieces overlap? You also have to be careful to get an even coat before it starts to harden. Once these systems start to harden your finished and any attempt to continue will turn into a moon scene of devastation, hence why some fear glass cloth covering. Some recommend using a roller (mini paint roller) and plenty of paper kitchen towels to dab and soak up the excess applied. Something I can’t get to grips with and does not work with some epoxy resin systems. Why use a method that applies too much and then have to take it back off? Too much resin and an uneven surface is a lot of sanding and some products don’t sand easily. Also if you get the resin/hardener mix wrong it may not go off or goes rubbery and defeats the reason for fibreglass cloth covering which is to give strength and protection to the surface layer.
Simple Ground Rules
You cannot glass over open structures
Store the resin at room temperature (it mustn’t be stored cool, which is the opposite to Cyanoacrylate)
Measure accurately the correct mixture of hardener to resin
Measure accurately any reducer to be used
Planning & Tools
Woven fibreglass cloth can be bought in varied sizes and weight. I use 50g (1.08 oz per square meter) from Fibretech in the UK. The quality of the cloth has always been excellent. You require enough that will overlap the area to be covered by 3” to 4 “ minimum.
Z-Poxy Finishing Resin
Mineralised Methylated spirits
Tack cloth
Latex protective gloves
Mixing cups with measures marked
Stirring stick (I use lollipop sticks)
Foil container (Rice container from the Chinese take-away is perfect)
Good quality paint brush (mid price range and not nylon bristles) of suitable size e.g. 1½” for wings
Good quality 3” paint brush that is soft (not for resin glue use)
Protective plastic sheeting for workbench
Old newspaper
Magazine
Apron (to protect you and watch out for drips onto your shoes and floor. You can’t wipe it off carpet)
Sharp scissors (must be sharp or the cloth will drag. It will not tear and I find scalpels unpredictable)
Paper kitchen roll for spills
180 grit sandpaper for feathering edges
Acetone (ideally 500ml) for cleaning tools and never allow it to get onto resin surfaces.
A word of warning about Acetone. We use it as a dissolving/cleaning agent with epoxy and it must not come into contact with the finished surface. Other people use it in the illegal drug manufacturing process. You normally can only obtain it at your chemist in very small 50ml bottles. If you try and buy more than 2 bottles at a time from Boots Chemist for example, you are normally refused and your identity if known will be passed to the police. The days of them storing it in 1+ litre bottles has long gone. I get 500ml bottles from Fibretech when I’m at the model shows. I believe it is prohibited from being sent in the postal service. You can get away without having any, but you’ll end up buying a lot of brushes and find it difficult to clean the scissors, which will loose their sharpness as a result, or to clean any spillage. It is also has another use to clean oily plastic iron-on coverings that you may need to repair or apply a patch over on your model.
My Preferred Method
First Stage:
Surface preparation should be smooth and dust free. I find that going over with a Hoover nozzle is very good at getting those bits you can’t see and out of crevices. I then use a tack cloth to wipe the surface. I cannot over stress how important it is that the surface is free of dust.
Now place the model part on top of plastic sheet protecting the workbench. If you don’t you’ll wish you had.
Now and not before place the fibreglass cloth over the area to be covered and using the sharp scissors cut an overlap of 3” to 4”. Placing a magazine on top helps to stops it from moving as you go around a large area. If you have left over cloth that can be used another time, put it into a plastic bag and store away now. Resin is insidious stuff and any tiny amount that gets onto the unused cloth will cause you a headache, probably having to throw it away.
Now take the 3” soft bristle brush and carefully from the centre area, brush out the fibreglass cloth in all directions, always away from the centre. We are smoothing out the cloth and you will find that the brush makes it become static and the cloth will cling to some extent to the model surface. The cloth is now ready for the resin coating. Note this is the only use for the 3” brush, so put it away safely.

Put on your latex protective gloves and over the newspaper measure as required 50:50 of Pacer Z-Poxy Finishing Resin and Hardener into a measuring cup and tip it into the foil take-away container.

Now measure Methylated Spirit 20% of the total volume of the combined Resin/Hardener and mix it in stirring for approximately 2 minutes and leave to stand for no more than 1 minute. If the room temperature of the Resin is correct the whole mixture will turn clear as you mix in the Methylated spirit. If your mix is too cold it will stay a deep purple colour and it is too late to do anything. This coloured mix will have a shortened working time. Go and store the Finishing Resin in the airing cupboard for a couple of hours before mixing another batch. Do not leave it in the airing cupboard for storage purposes, it is normally too hot.
Did you know: Fibreglass workers are known to store resin while doing a job, in a confined light box which consists of a closed box with a normal light bulb turned on and a shelf for the resins. The light bulb produces a perfect radiant heat to maintain working temperature of the resin.
You will find that the mixed viscosity is now like water and is intended. If you use more than 20% Methylated Spirit the resin will become robbery and if very excessive it will not harden, so be careful with the measuring. You may want to measure the Methylated spirit separately. Whilst standing air bubbles will settle from the stirring but don’t leave for too long as your working time is counting down all the time. The air bubbles are not an issue in any event.
Did you know: If you put resin mix into a confined container it accelerates the hardening process. This is why we use a take-away foil container with a wide flat base. When making a large amount of resin never use a mixing cup to brush resin from.
Now take your application brush and starting in the centre of the cloth, brush out in all directions the resin. A good quality brush normally won’t loose bristles, but if you do pick them out straight away. Cheap brushes normally shed bristle when using resin, like flies around a jam pot and you can end up in a mess. Don’t forget we have the Acetone to rescue the more expensive brush after being used. I use a 1 ½” brush on large surfaces like wings, a smaller brush takes too long.
Use care over large surfaces and not to drag the cloth when applying the resin or you’ll end up with an exposed surface area and no cloth when nearing the end of the job. It is also important not to allow the fibreglass cloth to stretch or creep. The cloth has a grain and will part if you’re rough with it. The resin will go on like water and can be spread very quickly.
When you get to the edges, decide where you want overlaps to be. For example on wings cover the underside of one half and allow it to dry before doing the other top half. I overlap by 1” to 2” hence 3” to 4 “ cut overlap. If you try to have a larger overlap it is very difficult to adhere to the surface from underneath and gravity acting on the weight of an excessive overlap will peel it off the model and you’ll end up with a mess! Use the scissors to trim as necessary around compound curves. You do not glue all the overlap down, just the amount you require. If it starts to peel, trim some of the excess overlap. The rule is never try and do too much in one go and keep the edges tidy.

Should the resin start to harden before you have finished, you must stop immediately. My method normally gives 20 minutes minimum working time and normally that is enough for most big jobs. If you use no reducer in the resin, you can be down to 10 minutes working time if you’ve used excess hardener. Also don’t try and do too much in one go. One wing half is ample and it must dry before you start again. Stopping in the middle of applying the reduced resin and starting again after it has dried is not a problem.
Now clean your brush in a jam jar with Acetone or throw the brush away. Wait for the Resin to final cure. It will be tacky for a couple of hours. I usually do my resin applications in the evening and leave over night to dry (4 evenings to cover a wing).
Second Stage:
Using a scalpel trim as best you can the waste overlap. We are not after an edge with a perfect finish using a scalpel.

Now using a piece of 180 grit sand paper rub the edges of the resin coated cloth and any excess untreated cloth will come away very easily. Continue sanding to a feathered edge. The advantage of using the reduced resin method is that you can get a near invisible feathered edge, which is perfect for overlapping the next piece of cloth and not having to worry about any overlap ridges. You get an invisible overlap seam. Hooray.
Now repeat Stage One all over again for the other surfaces. Make sure the surface is dust free before you start.
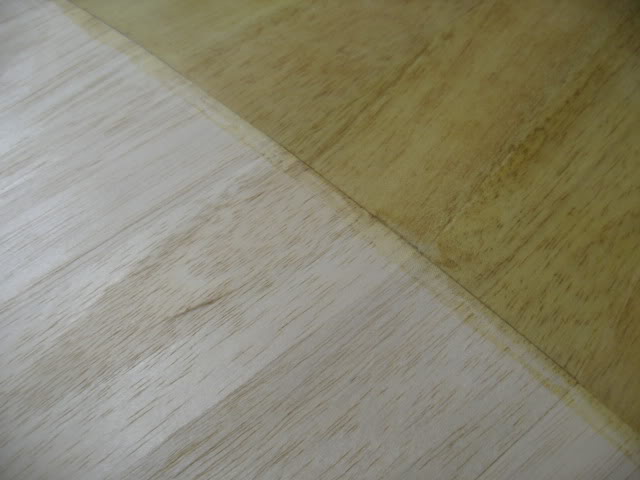
When you have finished covering, you will have a model surface that feels slightly rough and like Solartex covering. Now you very lightly run sandpaper over the surface to knock off high spots. Do not sand the weave down smooth expect to feather overlap edges which will become invisible to the eye and feel. There is little strength in the cloth at this stage of the process and sanding will remove the density of fibreglass cloth, which is important to retain for strength.
Third Stage:
We are now ready to give a final flow coat of resin to the surface. Again we Hoover and Tack Cloth the whole surface and if there was a more important time for doing so, this is it.
When clean and dry we measure amount required 50:50 of Pacer Z-Poxy Finishing Resin and Hardener into a measuring cup and place it into another clean foil take-away container as before but this time we do not reduce it with Methylated Spirit.
Working without interruptions apply an even flow coat of the resin over the fibreglass cloth. What you are trying to do is fill the exposed weave without applying too thick a coat, as excess will need sanding. You must fill the weave and make sure that during drying no foreign bodies are left in or allowed to get into the flow coat.
When the whole flow coat process has been completed, I leave the model part to stand for at least 72 hours before I sand down to that perfect “babies bottom” finish using 180 grit sand paper. Don’t forget to wear a facemask and don’t sand down into the weave of fibreglass cloth. The surface is then ready for painting.
There are a number of products on the market and probably the three most popular are; Ripmax SP Resin System, Poly C and Pacer Z-Poxy Finishing Resin. I’ve tried them over the years and the later is my preferred choice for a number of reasons. It is very easy to mix, gives you a work time to cover large area’s before “going off”, it doesn’t run unless you really over do a flow coat and most of all it is easy to sand to get that final “babies bottom” smooth surface.
Resin products are two part systems with a resin and hardener needing to be mixed together. Some products require a 2:1 ratio or ten drops of hardener to resin. Pacer Finishing Resin is a straight forward 50:50 mix and supplied in two squeeze bottles with colour coded tops so that you don’t forget which cap fits which bottle!
Finishing resin is the 2nd box from the right? Don’t use 5 min or 30 min epoxy resin glues for fibreglass cloth skinning. They are not manufactured or recommended for this use, so make sure you don’t mix the bottles up.
There are a number of ways to apply resin systems and this is normally when fear strikes. All work and have their merits. Some systems can be applied as a full strength mixture by dribbling it all over the glass cloth and spread it with a credit card until all the surface is saturated. This is without doubt a quick way to get the surface covered and I will use it for small areas to be covered. However I find on large areas requiring covering (wings and fuselage), if one is not careful the glass cloth stretches and can be difficult to cover compound curves (where the Fin and Stab join for example). Also being full strength one has to be careful with resin running particularly over lap areas when doing one piece of cloth at a time. Who wants ridges where the cloth pieces overlap? You also have to be careful to get an even coat before it starts to harden. Once these systems start to harden your finished and any attempt to continue will turn into a moon scene of devastation, hence why some fear glass cloth covering. Some recommend using a roller (mini paint roller) and plenty of paper kitchen towels to dab and soak up the excess applied. Something I can’t get to grips with and does not work with some epoxy resin systems. Why use a method that applies too much and then have to take it back off? Too much resin and an uneven surface is a lot of sanding and some products don’t sand easily. Also if you get the resin/hardener mix wrong it may not go off or goes rubbery and defeats the reason for fibreglass cloth covering which is to give strength and protection to the surface layer.
Simple Ground Rules
You cannot glass over open structures
Store the resin at room temperature (it mustn’t be stored cool, which is the opposite to Cyanoacrylate)
Measure accurately the correct mixture of hardener to resin
Measure accurately any reducer to be used
Planning & Tools
Woven fibreglass cloth can be bought in varied sizes and weight. I use 50g (1.08 oz per square meter) from Fibretech in the UK. The quality of the cloth has always been excellent. You require enough that will overlap the area to be covered by 3” to 4 “ minimum.
Z-Poxy Finishing Resin
Mineralised Methylated spirits
Tack cloth
Latex protective gloves
Mixing cups with measures marked
Stirring stick (I use lollipop sticks)
Foil container (Rice container from the Chinese take-away is perfect)
Good quality paint brush (mid price range and not nylon bristles) of suitable size e.g. 1½” for wings
Good quality 3” paint brush that is soft (not for resin glue use)
Protective plastic sheeting for workbench
Old newspaper
Magazine
Apron (to protect you and watch out for drips onto your shoes and floor. You can’t wipe it off carpet)
Sharp scissors (must be sharp or the cloth will drag. It will not tear and I find scalpels unpredictable)
Paper kitchen roll for spills
180 grit sandpaper for feathering edges
Acetone (ideally 500ml) for cleaning tools and never allow it to get onto resin surfaces.
A word of warning about Acetone. We use it as a dissolving/cleaning agent with epoxy and it must not come into contact with the finished surface. Other people use it in the illegal drug manufacturing process. You normally can only obtain it at your chemist in very small 50ml bottles. If you try and buy more than 2 bottles at a time from Boots Chemist for example, you are normally refused and your identity if known will be passed to the police. The days of them storing it in 1+ litre bottles has long gone. I get 500ml bottles from Fibretech when I’m at the model shows. I believe it is prohibited from being sent in the postal service. You can get away without having any, but you’ll end up buying a lot of brushes and find it difficult to clean the scissors, which will loose their sharpness as a result, or to clean any spillage. It is also has another use to clean oily plastic iron-on coverings that you may need to repair or apply a patch over on your model.
My Preferred Method
First Stage:
Surface preparation should be smooth and dust free. I find that going over with a Hoover nozzle is very good at getting those bits you can’t see and out of crevices. I then use a tack cloth to wipe the surface. I cannot over stress how important it is that the surface is free of dust.
Now place the model part on top of plastic sheet protecting the workbench. If you don’t you’ll wish you had.
Now and not before place the fibreglass cloth over the area to be covered and using the sharp scissors cut an overlap of 3” to 4”. Placing a magazine on top helps to stops it from moving as you go around a large area. If you have left over cloth that can be used another time, put it into a plastic bag and store away now. Resin is insidious stuff and any tiny amount that gets onto the unused cloth will cause you a headache, probably having to throw it away.
Now take the 3” soft bristle brush and carefully from the centre area, brush out the fibreglass cloth in all directions, always away from the centre. We are smoothing out the cloth and you will find that the brush makes it become static and the cloth will cling to some extent to the model surface. The cloth is now ready for the resin coating. Note this is the only use for the 3” brush, so put it away safely.
Put on your latex protective gloves and over the newspaper measure as required 50:50 of Pacer Z-Poxy Finishing Resin and Hardener into a measuring cup and tip it into the foil take-away container.
Now measure Methylated Spirit 20% of the total volume of the combined Resin/Hardener and mix it in stirring for approximately 2 minutes and leave to stand for no more than 1 minute. If the room temperature of the Resin is correct the whole mixture will turn clear as you mix in the Methylated spirit. If your mix is too cold it will stay a deep purple colour and it is too late to do anything. This coloured mix will have a shortened working time. Go and store the Finishing Resin in the airing cupboard for a couple of hours before mixing another batch. Do not leave it in the airing cupboard for storage purposes, it is normally too hot.
Did you know: Fibreglass workers are known to store resin while doing a job, in a confined light box which consists of a closed box with a normal light bulb turned on and a shelf for the resins. The light bulb produces a perfect radiant heat to maintain working temperature of the resin.
You will find that the mixed viscosity is now like water and is intended. If you use more than 20% Methylated Spirit the resin will become robbery and if very excessive it will not harden, so be careful with the measuring. You may want to measure the Methylated spirit separately. Whilst standing air bubbles will settle from the stirring but don’t leave for too long as your working time is counting down all the time. The air bubbles are not an issue in any event.
Did you know: If you put resin mix into a confined container it accelerates the hardening process. This is why we use a take-away foil container with a wide flat base. When making a large amount of resin never use a mixing cup to brush resin from.
Now take your application brush and starting in the centre of the cloth, brush out in all directions the resin. A good quality brush normally won’t loose bristles, but if you do pick them out straight away. Cheap brushes normally shed bristle when using resin, like flies around a jam pot and you can end up in a mess. Don’t forget we have the Acetone to rescue the more expensive brush after being used. I use a 1 ½” brush on large surfaces like wings, a smaller brush takes too long.
Use care over large surfaces and not to drag the cloth when applying the resin or you’ll end up with an exposed surface area and no cloth when nearing the end of the job. It is also important not to allow the fibreglass cloth to stretch or creep. The cloth has a grain and will part if you’re rough with it. The resin will go on like water and can be spread very quickly.
When you get to the edges, decide where you want overlaps to be. For example on wings cover the underside of one half and allow it to dry before doing the other top half. I overlap by 1” to 2” hence 3” to 4 “ cut overlap. If you try to have a larger overlap it is very difficult to adhere to the surface from underneath and gravity acting on the weight of an excessive overlap will peel it off the model and you’ll end up with a mess! Use the scissors to trim as necessary around compound curves. You do not glue all the overlap down, just the amount you require. If it starts to peel, trim some of the excess overlap. The rule is never try and do too much in one go and keep the edges tidy.
Should the resin start to harden before you have finished, you must stop immediately. My method normally gives 20 minutes minimum working time and normally that is enough for most big jobs. If you use no reducer in the resin, you can be down to 10 minutes working time if you’ve used excess hardener. Also don’t try and do too much in one go. One wing half is ample and it must dry before you start again. Stopping in the middle of applying the reduced resin and starting again after it has dried is not a problem.
Now clean your brush in a jam jar with Acetone or throw the brush away. Wait for the Resin to final cure. It will be tacky for a couple of hours. I usually do my resin applications in the evening and leave over night to dry (4 evenings to cover a wing).
Second Stage:
Using a scalpel trim as best you can the waste overlap. We are not after an edge with a perfect finish using a scalpel.
Now using a piece of 180 grit sand paper rub the edges of the resin coated cloth and any excess untreated cloth will come away very easily. Continue sanding to a feathered edge. The advantage of using the reduced resin method is that you can get a near invisible feathered edge, which is perfect for overlapping the next piece of cloth and not having to worry about any overlap ridges. You get an invisible overlap seam. Hooray.
Now repeat Stage One all over again for the other surfaces. Make sure the surface is dust free before you start.
When you have finished covering, you will have a model surface that feels slightly rough and like Solartex covering. Now you very lightly run sandpaper over the surface to knock off high spots. Do not sand the weave down smooth expect to feather overlap edges which will become invisible to the eye and feel. There is little strength in the cloth at this stage of the process and sanding will remove the density of fibreglass cloth, which is important to retain for strength.
Third Stage:
We are now ready to give a final flow coat of resin to the surface. Again we Hoover and Tack Cloth the whole surface and if there was a more important time for doing so, this is it.
When clean and dry we measure amount required 50:50 of Pacer Z-Poxy Finishing Resin and Hardener into a measuring cup and place it into another clean foil take-away container as before but this time we do not reduce it with Methylated Spirit.
Working without interruptions apply an even flow coat of the resin over the fibreglass cloth. What you are trying to do is fill the exposed weave without applying too thick a coat, as excess will need sanding. You must fill the weave and make sure that during drying no foreign bodies are left in or allowed to get into the flow coat.
When the whole flow coat process has been completed, I leave the model part to stand for at least 72 hours before I sand down to that perfect “babies bottom” finish using 180 grit sand paper. Don’t forget to wear a facemask and don’t sand down into the weave of fibreglass cloth. The surface is then ready for painting.
Guest- Guest
RDMFC :: Handy Hints
Page 1 of 1
Permissions in this forum:
You cannot reply to topics in this forum
» Police crash
» Bit of indoors
» For Sale
» selling up finaly!